 (Did you know that we have published a webinar as well on this topic?)
As a wholesale provider we preferably do not deal with end users. We simply cannot help them in most cases because their agreement is with you, our customer. Exceptions are abuse cases, nonresponsive (sub)resellers or other (mainly legal) scenarios. However, even in those cases we first try to get them in touch with their direct provider.
There is however a big, a very big exception: ICANN. ICANN requires us to send thousands of e-mails every day – to the end users. Contact verification, whois data reminders, upcoming expiration notices, transfer confirmations and more.
From the very beginning we have tried to hide the name of Openprovider as much as possible from these e-mails. We use a distinct trading name, and for some types of e-mails you could add your own name, e-mail address or other small elements. However, we didn’t think this was sufficient: we wanted our customer to control the e-mail, not Openprovider!
So what did we do? We started implementation of further flexibility. In languages, in texts, in lay-out, in everything. Over the last weeks we have finalized our customization tools. The regular user will have seen numerous new pages and features.
The best tool in the industry
Now we can say that we have finished this project, and we are proud of it: comparing our tools with the tools that we know from other registrars and from the feedback we get from our customers, we are convinced these tools are among the best in our industry!
Why? Because it provides full flexibility. Not “almost full” – just “full”:
- You can send e-mails from every e-mail address you like – and it’s spam filter safe.
- You can assign templates to groups of customers; you can even treat each single customer as a “group” and in that way assign a template to each single user.
- You can implement a complete multi-language experience that does not only include the Openprovider-supported languages English, Dutch, Spanish and Russian, but also German, Japanese and Swahili. At this moment I feel that I must apologize for my previous statement of “full” flexibility – I’ve discovered that Klingon is not in the list of supported languages.
- This is not limited to the transfer e-mails which most of you already know for a long time, but really every e-mail that Openprovider sends within the compliance requirements of ICANN:
- Transfer notifications for incoming and outgoing e-mails
- Contact verification e-mails
- Trademark claims notification e-mails
- Whois Data Reminder Policy (WDRP) e-mails
- Expired Registration Recovery Reminder (ERRP) e-mails
- Registration agreement e-mails (in the future)
- Registrant change confirmation e-mails (in the future)
With these tools, you are as flexible as if you were an accredited registrar yourself. You’re even more flexible, as an accreditation itself does not provide you with mailing tools. You’ll have to develop them all by yourself. Don’t start this implementation, but let Openprovider do it; let Openprovider maintain and improve the code.
Hands-on example
I can write a technical manual about how to configure personalized e-mails, but I rather keep this blog post a bit airy and refer for the dry technical stuff to our Knowledge Base. Instead, I want to guide you through the possibilities using a realistic example.
Our customer base and starting situation
In this example I assume that I am a web hoster with primarily national customers, a few international ones and two resellers that handle their own customers. Let me show them on a map:
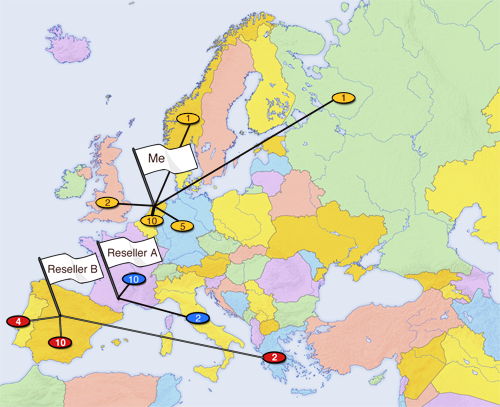
You see that I have 10 Dutch customers, 5 German, and so on. Reseller A has 10 French and 2 Italian customers and that should explain the spreading of my customer base.
I have not configured anything yet in my control panel at this moment: no templates, no languages, no tags, nothing. As a result, every e-mail will be sent with Openprovider’s white-label e-mail address, and at some spots my company name in the e-mail.
Creating tags
As a first improvement, I want to tell Openprovider which customers belong to my two resellers. This is called “tagging” and is done on customer level. I create the “customer” tags through the menu Account > Settings > Tag management. I create two customer tags: “Reseller A” and “Reseller B”:
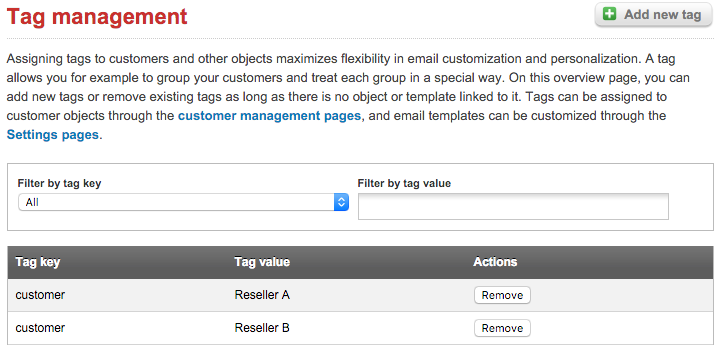
Tagging my resellers’ customers
Now it’s time to tag my resellers’ customers through the “modify customer” pages. For each customer belonging to one of these two resellers, I open the customer details and assign the right tag:

Don’t let this one-by-one change withhold you from doing it: our API allows you for full automation! If you tag each new customer at the moment of creation, your account will always be up to date.
Creating a template for contact verification
Until this moment, nothing will have changed yet with respect to the e-mails that Openprovider sends, but that’s gonna change now. I’ve chosen to customize the contact verification e-mails, because these contain all possible customization options. The other types of e-mails are similar or even simpler.
Looking into the Contact verification branding pages for the first time, you will only see four system templates: one for each language supported by Openprovider.
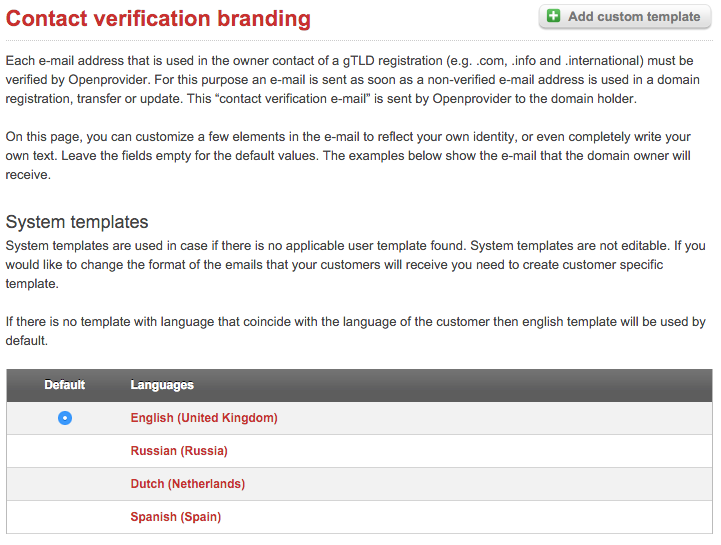
I want my own text in here, so I start with a new template for the Dutch language. Note that you see many different variants of Dutch: for the Netherlands, for Belgium, for Suriname, … This allows you to use different templates for different global regions which again is a proof of the extreme flexibility of our tools!
As I am now creating a new template for myself and not for one of my resellers, I leave the Tag empty. If in a couple of minutes the templates for Reseller A or Reseller B will be created, then of course select the right tag!
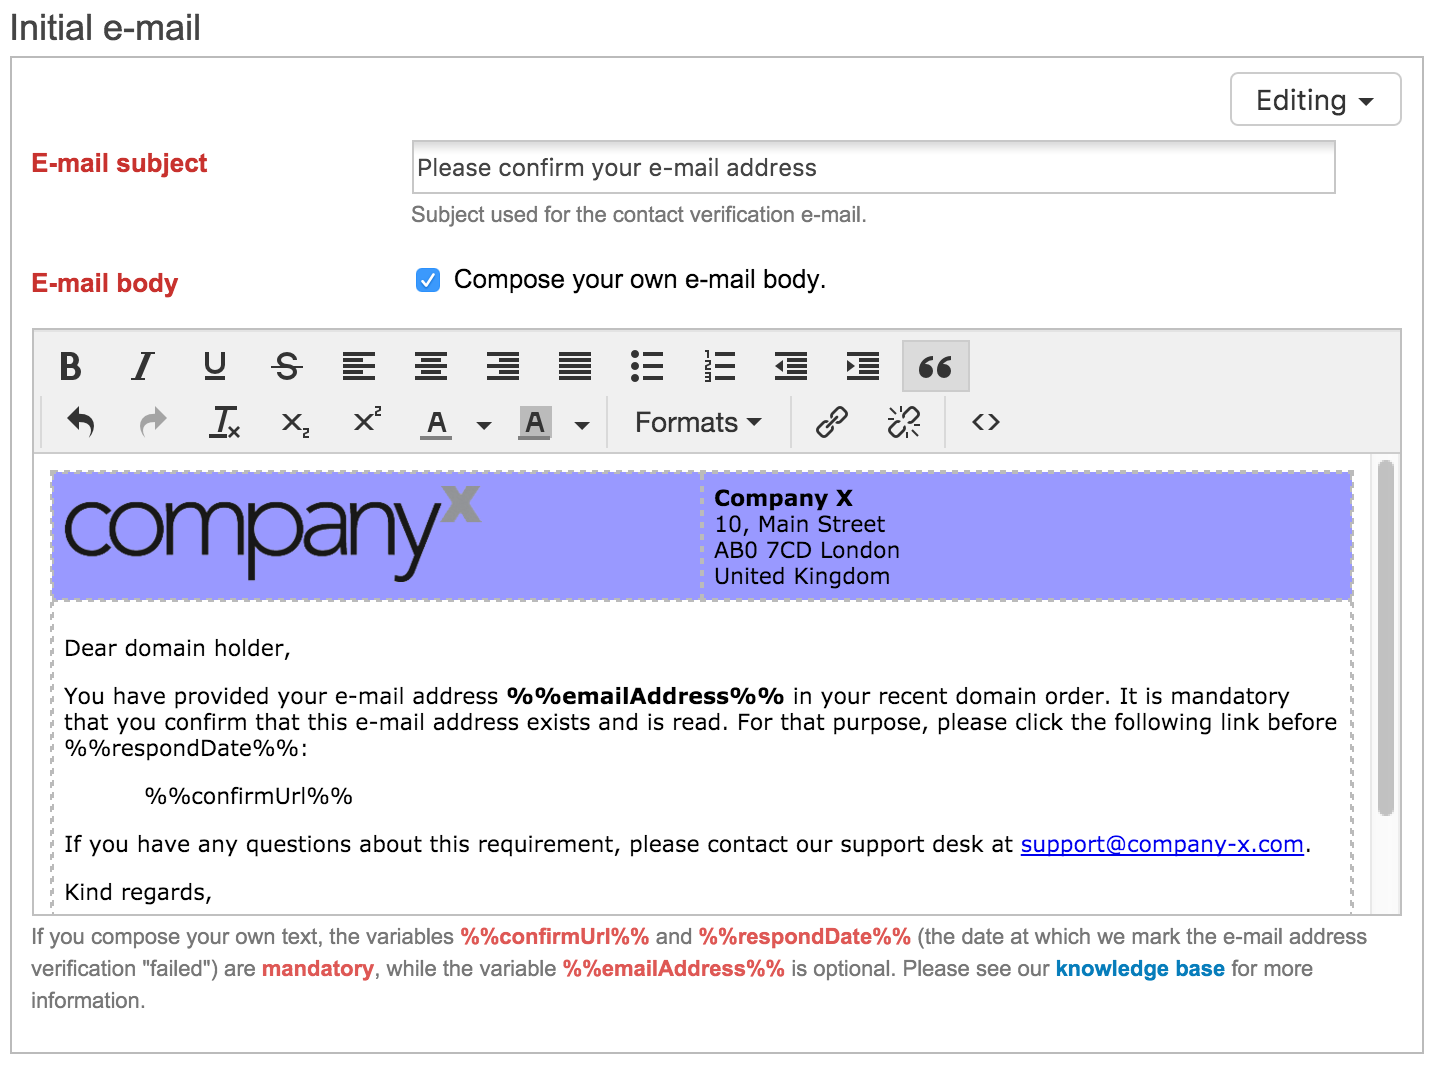
Composing the e-mail is fairly simple now. The most interesting element is the Confirmation link which I’ll explain further down. Before saving, you can review it and if everything is okay, save the template. If you are sure it’s ready for production, you can immediately choose Activate. (Inactive templates allow you to prepare a new version, without discarding the current one yet.)
Let me show you an example of a template that uses customized images, styles, colors and a table:
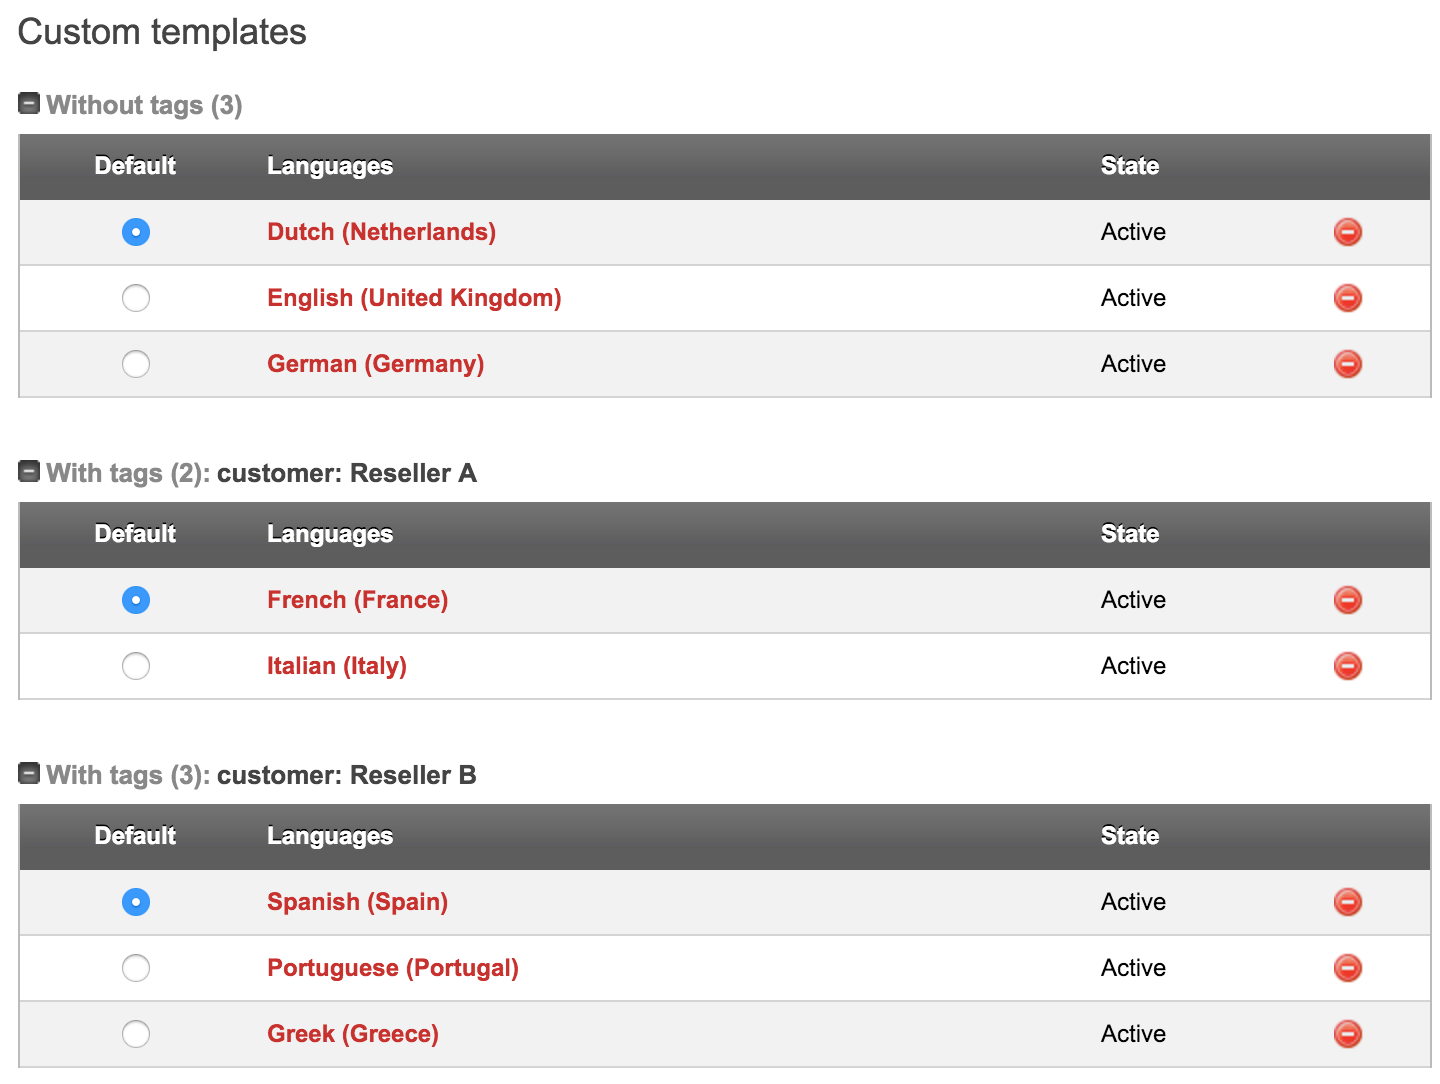
As I am a Dutch web hoster with mainly Dutch customers, I feel I can safely select this Dutch template as default: if the template is used for a customer for which no language is pre-defined, the system will fall back to Dutch. If you are more internationally oriented you may want to make the English version the default one.
The following image shows a typical setup where multiple languages have been defined for multiple tags.
Fine tuning languages
By default, Openprovider will decide a customer’s language based on its country code. In most cases that will succeed, but what about countries with multiple languages like Switzerland and Belgium? Or what do you think of a Dutch customer living in Berlin, Germany? This is where the Language parameter in the customer management pages shows its use:

Redirect the customer to your own website
In the e-mail that is sent to verify the customer’s e-mail address, a link is placed on which the customer should click. Normally this leads to a white-label page on a neutral URL without any branding:

Wouldn’t it be nice to redirect the customer to your own (or your reseller’s) website, showing him a nice page, in his own language, in your corporate style? It’s all possible, but at (small) development cost. Our Knowledge Base contains a clear how-to.
E-mail authentication
We’re almost there. At this moment, Openprovider will send a specific e-mail based on (a) the language of the customer and (b) to who the customer belongs (to you or to one of your resellers). It uses your subject, your text, your formatting, your links and your e-mail address as sender.
At this point I’d like to introduce the last step in the process. The e-mail still is sent from our server! Technically this is no problem at all: the e-mail will be delivered to the right server. Some clients and particularly most filtering applications (like spam filters!) however check if the server that actually sent the e-mail is also authorized to send it.
This is a whole technical story; the only thing that you need to know is that you must configure the domain name(s) that you use as sender address in such a way that they authorize our mail server to send e-mail in your name. Of course, we have made this as easy as possible for you: just visit the e-mail authentication pages in your control panel, add the domain name(s) that you use in the sender address(es) and click the Authenticate button to see the two nameserver records that must be added to your domain’s DNS zones.
Closing notes
Having configured your domains and your e-mail templates through the above steps leads to optimal recognition of your e-mails by your customers or your reseller’s customers. They are served an e-mail that arrives from you, uses your corporate style, uses your texts and points to your website for confirmation and not some unknown website.
We strongly encourage that you familiarize yourself with the powerful tools of customization and personalization and provide your customers with the optimal user experience. If you encounter any problems during the different configuration steps, our friendly support department is always happy to help you.
Your gain is in reduced after sales: less questions about ‘vague e-mails’, less ignored confirmation requests, less failed transfers or verifications.
And do not forget the unique selling point that you can offer your customers: not only you but also they can fully profit from Openprovider’s customization!

